
Rose Growing Guide
New to Roses? Start here
|
Where to plant roses
Roses are not only beautiful they are extremely versatile and hardy plants that can be planted in a variety of positions and locations in the garden. When selecting a planting location, we recommend you consider the following points to ensure the rose thrives: 1. Ensure plenty of sunlight
2. Avoid intense competition from other plants
3. Avoid very exposed, windy sites
|
How to plant roses
PLANTING A POTTED ROSE
Tools you will need:
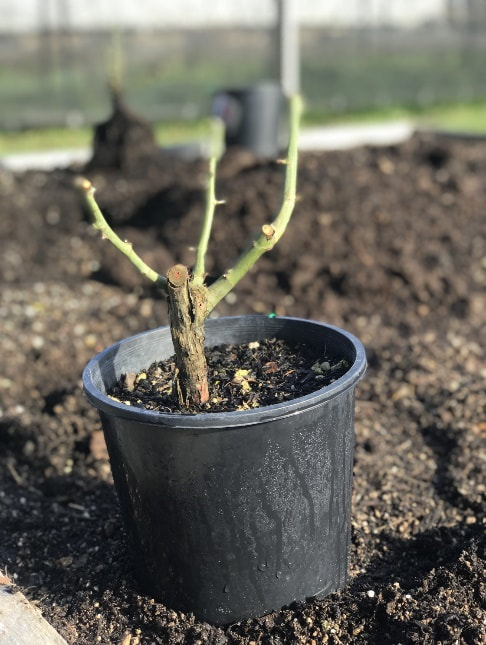
Soil should be at the height of the Crown where the branches come out. (Picture shows Crown too high).
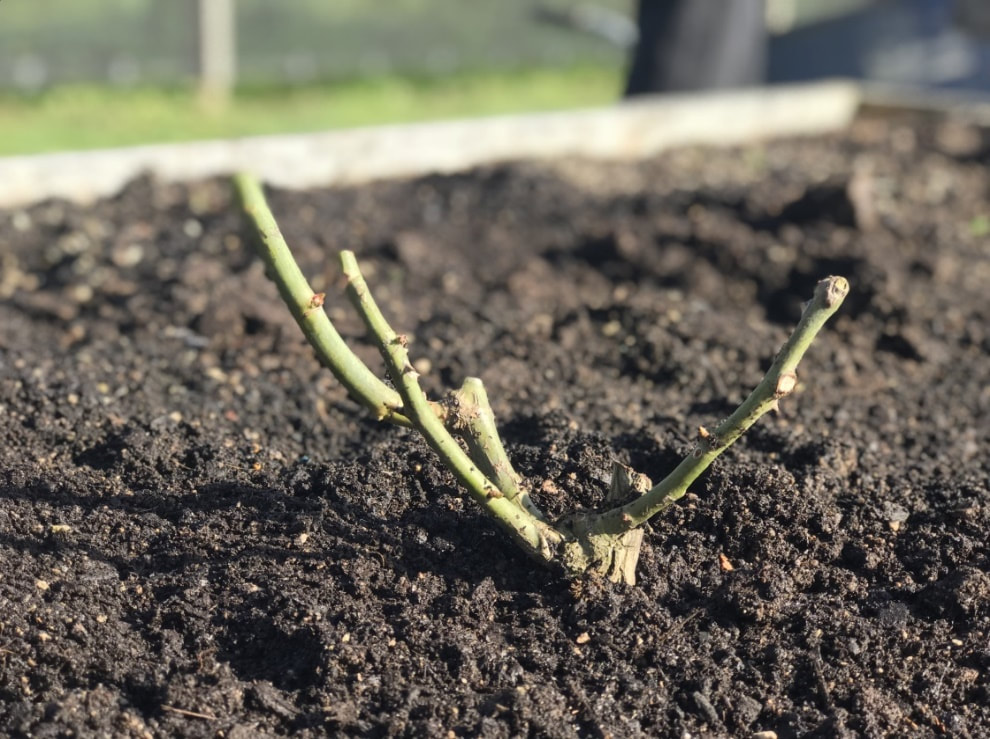
This is the correct depth – the crown is sitting at soil level, unless you are planting a Standard (Tree) Rose.
Enjoy your RosesTHEY ARE JUST PLANTS – BEAUTIFUL PLANTS – BUT STILL, JUST PLANTS.
|
Planting a bareroot rose
|
Tools you will need:
|
Pro tip: Never let the roots dry out before planting
|
Note - Own root roses have no gap between the shoots and the roots.
NO TIME TO PLANT YOUR BAREROOT ROSE STRAIGHT AWAY? If you receive your new bareroot rose bush and cannot plant it immediately you can ‘heel’ it into a temporary spot in your garden until you get around to it. The vegetable garden is often used for this exercise. Why bother? It keeps the roots damp in the interim as keeping them in a bucket of water for any length of time would cause root drowning problems. To ‘heel’ in a rose, dig a trench and lay the roots in with the bush on an angle. Then cover the roots with soil. |
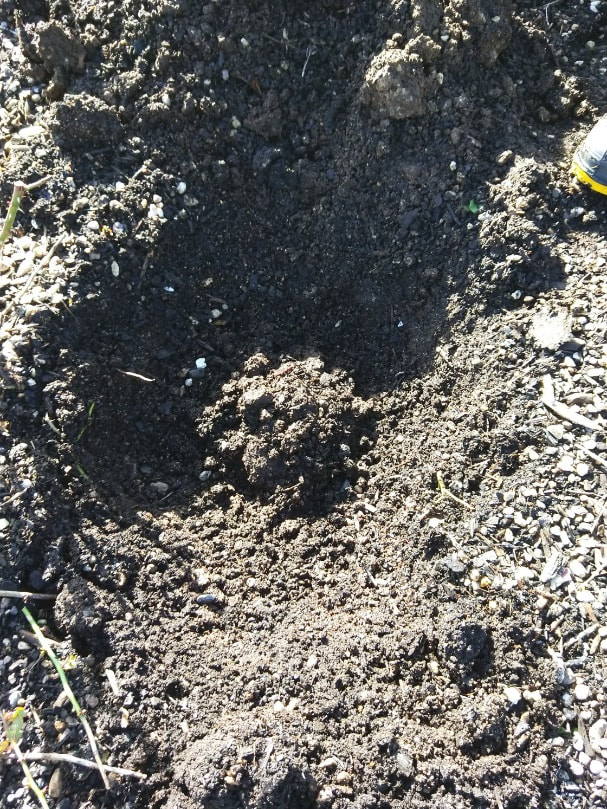
Step 2: Dig a large hole (larger than the root length)
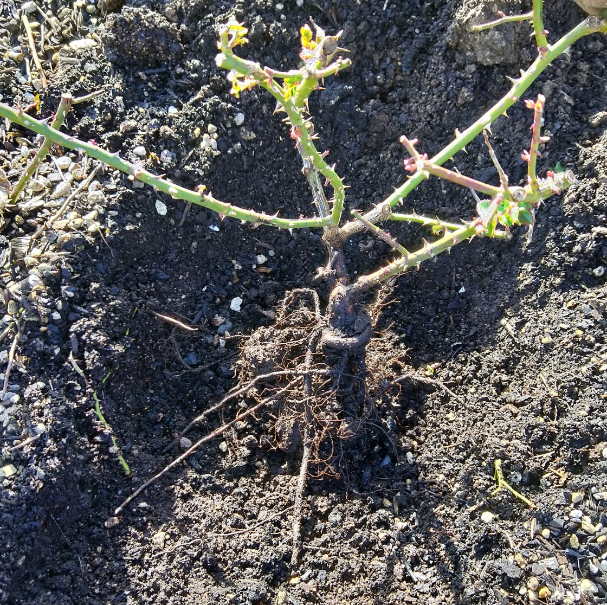
Step 4: Spread the roots over the mound
Step 6: Plant the rose up to the crown
|
|
Growing roses in a decorative pot
Roses look great planted in a decorative pot so just follow these five steps to success!
All you need to know about dead-heading roses
WHY DEAD HEAD? Two Reasons:
WHEN TO DEAD HEAD This should be done as soon after each flowering as possible up to early April. After April your plant will be getting ready for winter and the canes hardening off. Do not force it to flower again by dead-heading or the new shoots will be frosted. HOW TO DEAD HEAD Each flowering stem should be cut back at least as far as a leaflet with five leaves or as thick as a pencil. The amount you cut back controls, to some extent, the shape and size of your plant. If you Dead head to prune during the growing season this will stop your rose getting too tall. If you are unsure, cut back to the point where the flowers stop being produced on the stem. DO NOT DEADHEAD IN A DROUGHT If there is a lack of water in summer DO NOT DEAD-HEAD your roses. They can get by without water for a while but they must not be trying to actively grow and produce more flowers or seed pods, after all that is what nature is all about - reproduction of the species. Do not dead-head, just leave them to form their hips (seed pods) and go into semi-dormancy until the dry spell is over. Once you have had good rain, then cut back, give them some fertiliser, keep them watered if necessary (the rain dries up again) and they will shoot away again. Of course, if you have access to plenty of water then you have no problem, keep them deadheaded with a bit of rose fertiliser every couple of months until February and they will keep flowering all summer long. Pest & Disease Control Tips
SPRAYING ROSES TO CONTROL PESTS Greenfly (aphids) and caterpillars are the most common pests - we use biological control, birds and ladybirds. We find nature balances pests. Greenfly and caterpillars can be removed by hand in the earliest stages. If you wish to spray, consult a local specialist Garden Centre as to what to use. Pests worthy of Mention- No rose can be bred to resist bugs unfortunately. Scale Insects are a nuisance and can cover the stems – they look like little white ‘limpets’ that suck the sap out of your rose plant weakening it. Spray these with Neem, Eco-Oil, or Conqueror Oil in Winter at Winter strength to smother them. You could add an insecticide as well to make sure. They can be sprayed in summer too but read the label and spray at summer strength or you could ‘burn’ the leaves. Mites or Spider Mites can be obvious in Summer, they make the leaves appear dry and ‘dusty’. If they are really bad they will form webs, like spiders. They are miniscule, barely visible to the naked eye. Mites can be very pesky if the rose is growing with protection by a house or wall. These will need treatment with Neem, Eco-Oil, or Conqueror Oil at summer strength which smothers them. There are Miticides that work (at least once) but Mites are good at building up resistance to chemicals so change your chemicals, don’t keep using the same one or you will find it no longer effective. They do not build up a resistance to oil because it acts by smothering them. SPRAYING ROSES TO CONTROL DISEASE We specialise in roses that have been bred to be resistant to disease especially Black Spot, Rust and Powdery Mildew, or at least tolerant to diseases when they may get some spots but they will keep growing and flowering without treatment during the flowering season. We do recommend a Winter ‘clean up’ spray with Copper and Oil (Neem, Eco-Oil or Conqueror) to kill any fungous spores, insects, or mites that are in the garden ready to attack next summer. The main fungal challenge for roses in some areas is Downy Mildew which is around in Spring and sometimes Autumn with cooler nights and warm days and lots of humidity. Some varieties are not so resistant to Downy Mildew in which case you may be required to spray. Downy Mildew is very similar to Black Spot in appearance. Symptoms are dark purple blotches on the leaves - differentiated from Black Spot which is Black and circular with a yellow halo. Or, leaf fall without any spots, just a sudden dropping of all leaves. WHEN TO SPRAY We recommend you spray at the first sign of disease especially Downy Mildew. Use a Copper or Sulphur Spray for Downy Mildew. You may have to spray again in 10-14 days. Remember once the leaves have disease damage, spraying will not make them go green again. You are spraying to kill the spores and prevent further damage. If you must spray - Please cover yourself up and use a spray mask when spraying. Keep yourself safe. |
What you need to know about feeding roses
All roses appreciate being fed, particularly repeat-flowering roses. If you wish to get the most out of your roses we always recommend feeding. WHEN TO FEED For the best results, we recommend three annual feeds:
For the best results, we recommend using any specially formulated rose food. HOW TO FEED Simply sprinkle rose food around the base of each rose following the instructions on the packet. Pro tip: Rose roots spread out in the same way as the branches of the rose so place the fertiliser around the ‘drip line’ and not too near the base of the plant. Pruning Pro Tips
WHY PRUNE ROSES? There is so much written about rose pruning that people are worried about doing it. Three different people will show you three different ways to prune. There is no right or wrong way to prune. The important thing to understand is the purpose of pruning; it is done to reinvigorate your bush to produce good strong growth with lots of flowers. Prune to remove small unproductive shoots, dead or dying branches, crossing branches. WHEN TO PRUNE It is important to know when the rose plant flowers otherwise you may lose your display of blooms. Once flowering roses are pruned in summer, after they have flowered. These are usually rambler and some heritage types. Trim to shape, flowers will be produced next summer on the new wood made during this summer. Repeat flowering roses are pruned in winter Mid-July to mid-August. These flower all summer long until frosts. TOOLS Ensure your pruning tools - secateurs, loppers and pruning saws are sharp, it is very exhausting trying to cut with blunt tools. PRUNING WEATHER Prune on a day that will get your washing dry. Pruning on damp, foggy days encourages fungous and blight to infect your precious rose bushes. HOW MUCH SHOULD I TAKE OFF? Cut out about two-thirds of last season’s growth. The more branches you leave the more flowers you will have but they will be smaller. Fewer branches means larger flowers but less of them (which is what the rose exhibitors are wanting) but for garden display you may prefer a lighter prune. STEM SIZE RULE OF THUMB If you are cutting back a garden rose, not a miniature, we recommend you cut out any growth smaller than a pencil and cut back your shoots to where the stem is at least as thick as a pencil. Miniature roses are treated the same way but to a smaller scale. WHERE TO CUT Cut to a growth bud as you do when deheading. This is where a leaf was once growing from the stem, you can see the little growth bud which will shoot away in spring and flower. Cut just above the growth bud, if you leave too much of a stub this could cause dieback of the cane. BASAL GROWTH The purple/red growths coming from the base are new and very precious, do not cut these back too hard. Cut out the middle leaving a couple of side shoots on the top which should be shortened back to a couple of growth eyes. There may be some basal growths that have turned green, they can be cut a bit harder. Any old, dying, yellow growths from the base can be cut right out at the base to make room for new basal shoots. Note – Any growth from the base that is quite different from that of your rose could be a rogue rootstock shoot. This must be traced back down under soil level to where it is shooting from and cut right out hard or it will keep reshooting and eventually take over from the hybrid rose grafted onto it. These growths are usually fast growing, thornless, have pale green leaves with many leaflets (rather than the usual five), will have little white flowers once in spring. Do not confuse these with a basal growth described above. LANDSCAPE SHRUBS Landscape roses can be pruned with electric hedge trimmers, a nice quick job. What you need to know about watering roses
The right amount of watering will promote a healthy plant that will flower over a long period and make available the fertiliser you have given it. WHEN TO WATER Watch out for particularly prolonged dry spells of two weeks or more, particularly if the weather is hot.
Summer Watering (December – March)
WHAT YOU NEED If you have to hand water, a hose with a rose attachment is excellent. If you haven’t got a special fitting, make sure the pressure is not too high on your hose. We recommend a softer spray rather than a fierce deluge from a jet spray or pressure hose. If you do not have to hand water, the use of a ‘leaky hose’ which drips water at a slow rate over a long period straight to the roots is excellent, especially when used at night. HOW TO WATER Hand watering
ROSES OR SITUATIONS THAT REQUIRE EXTRA WATERING ATTENTION:
|